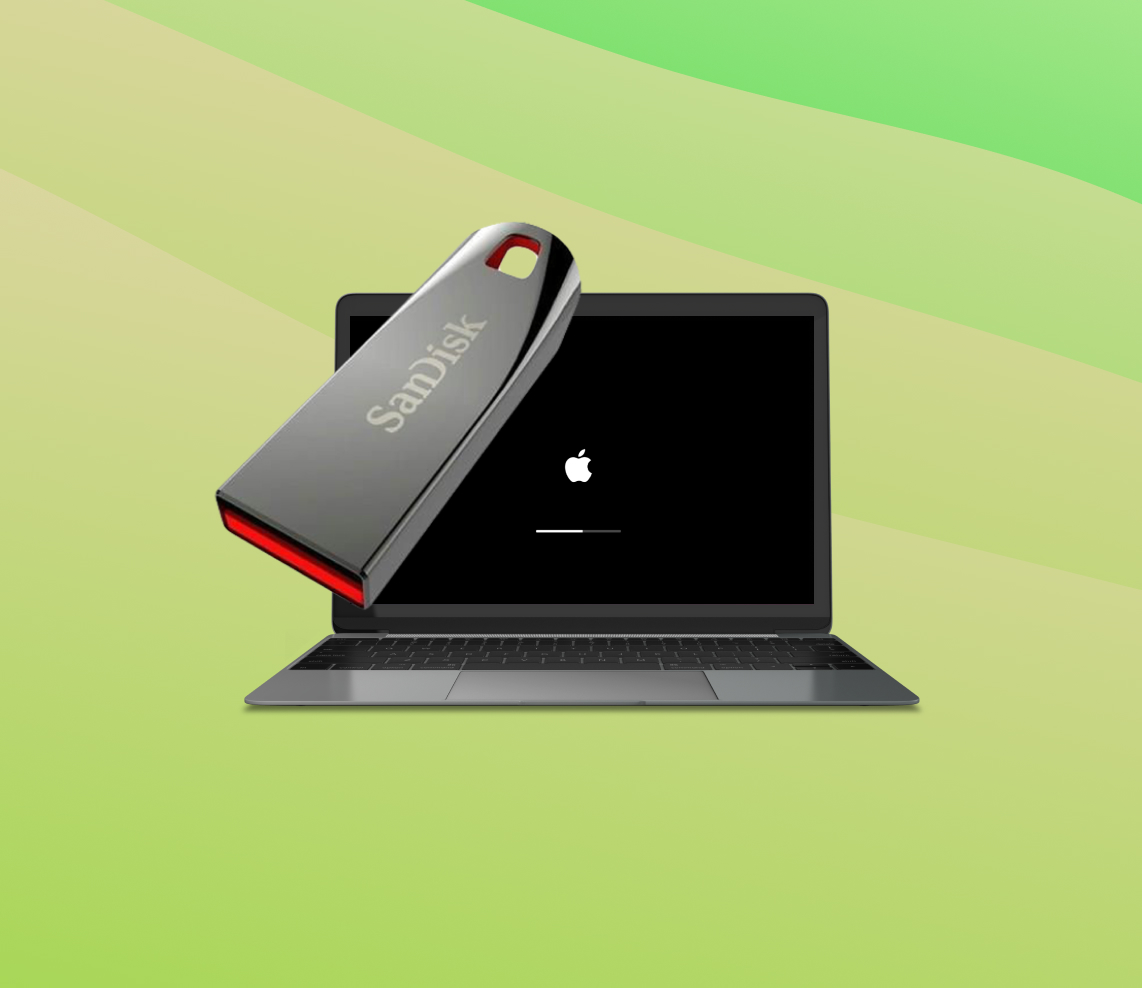
Booting a Mac from a USB drive offers various advantages, including portability, recovery options, and the ability to test new operating systems. This article explores the process of booting from a USB drive on a Mac, starting with an overview of the boot process and the benefits it offers. It provides step-by-step instructions on preparing the Mac for booting, creating a bootable USB drive, and initiating the boot process. Alternative methods using Thunderbolt and FireWire connections are also discussed. Additionally, advanced considerations and troubleshooting tips are provided. By following this guide, Mac users can enhance their experience, troubleshoot boot issues, and explore new possibilities.
How Booting from USB Works on a Mac
When it comes to booting a Mac, the process involves loading the necessary software and initializing the hardware to start up the computer. While macOS is typically installed on the internal hard drive or SSD of a Mac, there are instances where you may need to boot from an external drive, such as a USB drive. In this article, we’ll explore the process of booting from a USB drive on a Mac and the benefits it offers.
The Boot Process on a Mac
Before diving into booting from a USB drive, let’s briefly understand the regular boot process on a Mac. When you turn on or restart your Mac, it goes through a series of steps to initialize the system:
- Power-On Self Test (POST): The Mac performs a self-diagnostic test to ensure the hardware components are functioning correctly.
- Boot ROM: The Mac’s Boot ROM firmware, also known as EFI (Extensible Firmware Interface), is executed. It performs hardware initialization, selects the startup disk, and loads the next stage of the boot process.
- Boot Loader: The Boot Loader is responsible for loading the macOS kernel and other essential files required for the operating system to start.
- Kernel Initialization: The macOS kernel initializes the hardware, mounts the root file system, and launches launchd, which is responsible for starting the system services and processes.
- Login Window: Finally, the login window appears, allowing you to log in and access your macOS user account.
Benefits of Booting from a USB Drive
Booting from a USB drive provides several benefits for Mac users:
- Portability: With a bootable USB drive, you can carry your operating system or diagnostic tools wherever you go. It allows you to access your Mac’s files and applications on different machines.
- Recovery and Troubleshooting: Booting from a USB drive is often used for recovery purposes. It enables you to reinstall macOS, recover lost data, or troubleshoot issues without accessing the internal drive.
- Testing and Experimentation: By booting from a USB drive, you can test new macOS versions, perform software evaluations, or experiment with different operating systems without affecting your primary installation.
Preparing Your Mac for Booting from USB
Booting your Mac from a USB drive can be a useful technique in various situations, such as performing a clean installation of macOS, troubleshooting issues, or accessing a different operating system. To ensure a smooth and successful booting process, there are a few essential steps to follow. This article will guide you through the necessary preparations to get your Mac ready for booting from a USB drive.
Checking the System Requirements for Booting from USB
Before you begin, it’s important to verify that your Mac meets the system requirements for booting from a USB drive. Here are the general guidelines:
- Your Mac should be at least Intel-based, as booting from USB is not supported on older PowerPC-based models.
- Ensure your Mac has a USB port available. Most Macs come with USB-A ports, while newer models may have USB-C or Thunderbolt 3 ports. In the latter case, you’ll need a USB-C to USB-A adapter or a USB-C flash drive.
- Check if your Mac is compatible with the version of macOS you plan to install or use from the USB drive. Some older Mac models may have limitations on the macOS versions they can boot from external drives.
If your Mac meets these requirements, you can proceed with the necessary preparations.
Gathering the Necessary Equipment and Tools
Before you can boot your Mac from a USB drive, make sure you have the following equipment and tools:
- A reliable and compatible USB drive: Select a high-quality USB flash drive with sufficient storage capacity to hold the macOS installer or the operating system you intend to use.
- A stable internet connection: If you plan to create a bootable USB drive with the macOS installer, a stable internet connection is essential to download the necessary files.
- The macOS installer or operating system image: Depending on your purpose, you will need either the macOS installer, which can be downloaded from the App Store, or the specific operating system image you wish to use.
Once you have gathered these items, you can proceed to create a bootable USB drive.
Creating a Bootable USB Drive with macOS Installer
Creating a bootable USB drive with the macOS installer allows you to install or upgrade macOS on your Mac or perform a clean installation. Here’s a step-by-step guide:
- Connect the USB drive to your Mac.
- Open the Terminal application from the Applications > Utilities folder.
- Use the createinstallmedia command in Terminal to create the bootable USB drive. The command syntax should be similar to the following:
sudo /Applications/Install\ macOS\ [version].app/Contents/Resources/createinstallmedia --volume /Volumes/[USB Drive Name] - Replace [version] with the appropriate macOS version (e.g., Big Sur, Monterey) and [USB Drive Name] with the name of your USB drive.
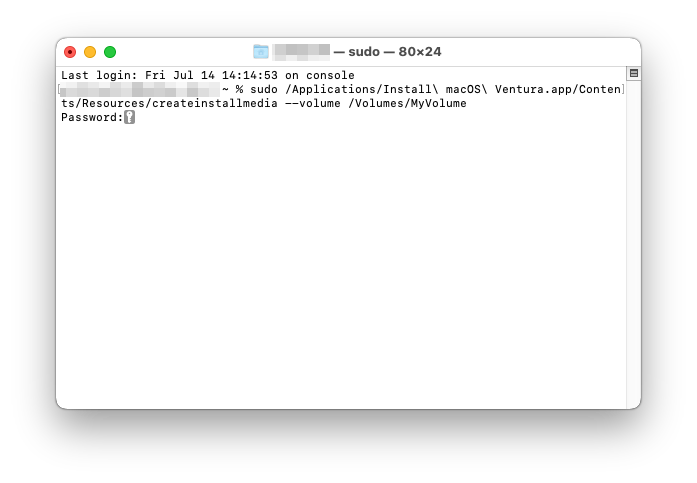
- Enter your administrator password when prompted.
- Wait for the process to complete. This may take some time.
- Once the process finishes, your bootable USB drive with the macOS installer is ready.
Remember to eject the USB drive properly before disconnecting it from your Mac.
By following these steps, you have prepared your Mac for booting from a USB drive. Whether you want to install a fresh copy of macOS or explore other operating systems, booting from a USB drive gives you the flexibility and control over your Mac’s startup process.
Booting Your Mac from USB
Booting your Mac from a USB drive can be a useful solution in various situations, such as installing a new operating system, recovering from a system failure, or troubleshooting software issues. By following a few simple steps, you can easily initiate the boot process from a USB drive on your Mac. Here’s how:
Restarting or Turning on Your Mac
The first step to booting your Mac from a USB drive is to restart or turn on your Mac. If your Mac is already on, save your work and choose “Restart” from the Apple menu. If your Mac is turned off, press the power button to turn it on.
Accessing the Boot Menu or Startup Manager
Once your Mac starts up, you need to access the boot menu or startup manager. This allows you to choose the startup disk or device. Here’s how you can do it:
- Immediately after turning on or restarting your Mac, press and hold the Option key on your keyboard.
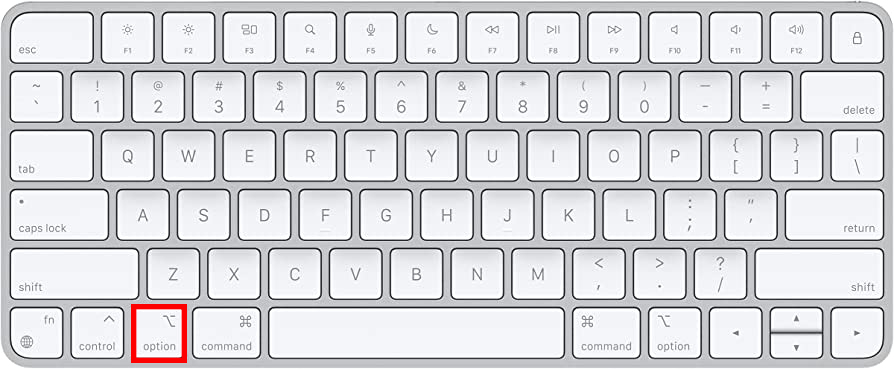
- You will see a list of available startup disks or devices, including your internal hard drive, connected USB drives, and any other bootable devices.
- Use the arrow keys to navigate through the list and select the USB drive you want to boot from.
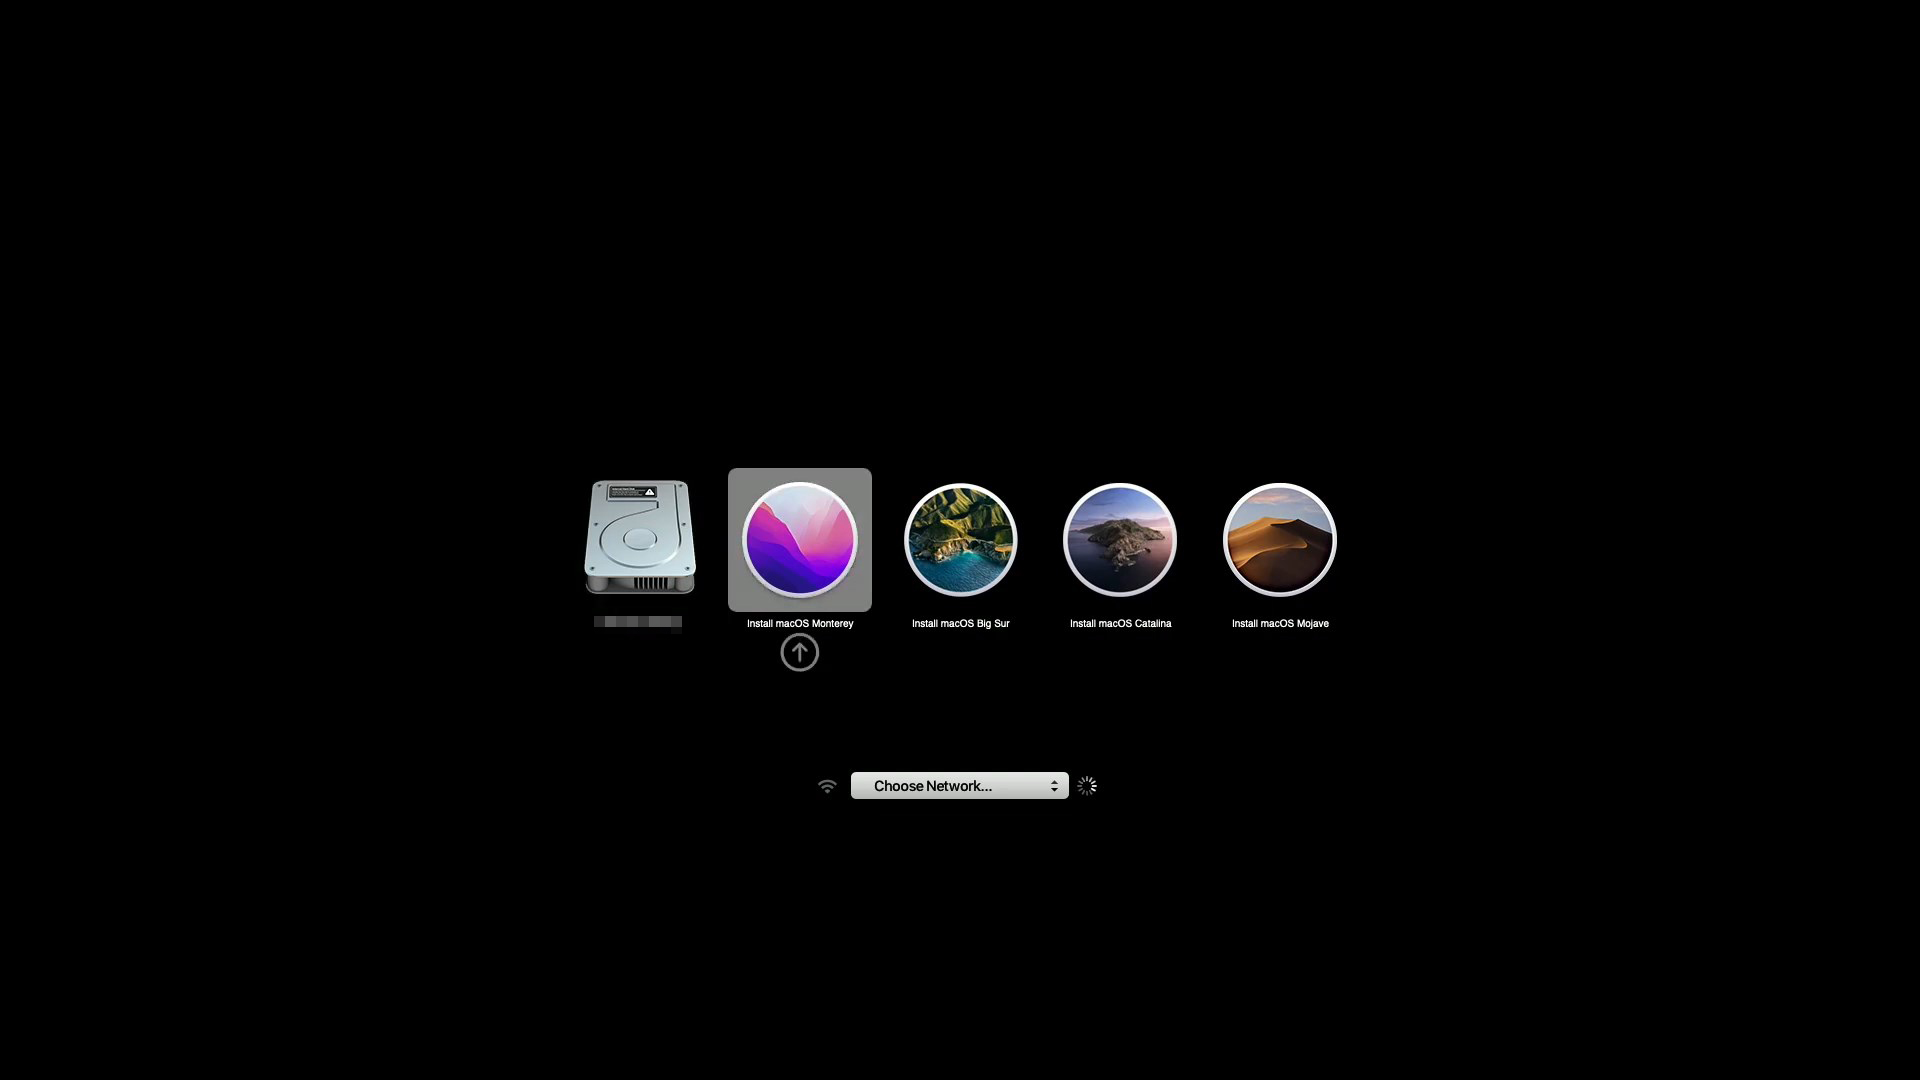
- Once you’ve selected the USB drive, press the Return key or click on the right-pointing arrow button to initiate the boot process from the USB drive.
Note: If you’re using a Mac with Apple silicon, such as the M1 chip, you might need to press and hold the Power button instead of the Option key to access the startup options.
Selecting the USB Drive as the Startup Disk
Alternatively, you can set the USB drive as the default startup disk on your Mac. This way, your Mac will automatically boot from the USB drive whenever it starts up. Here’s how:
- Go to the Apple menu and choose System Preferences.
- Select Startup Disk.
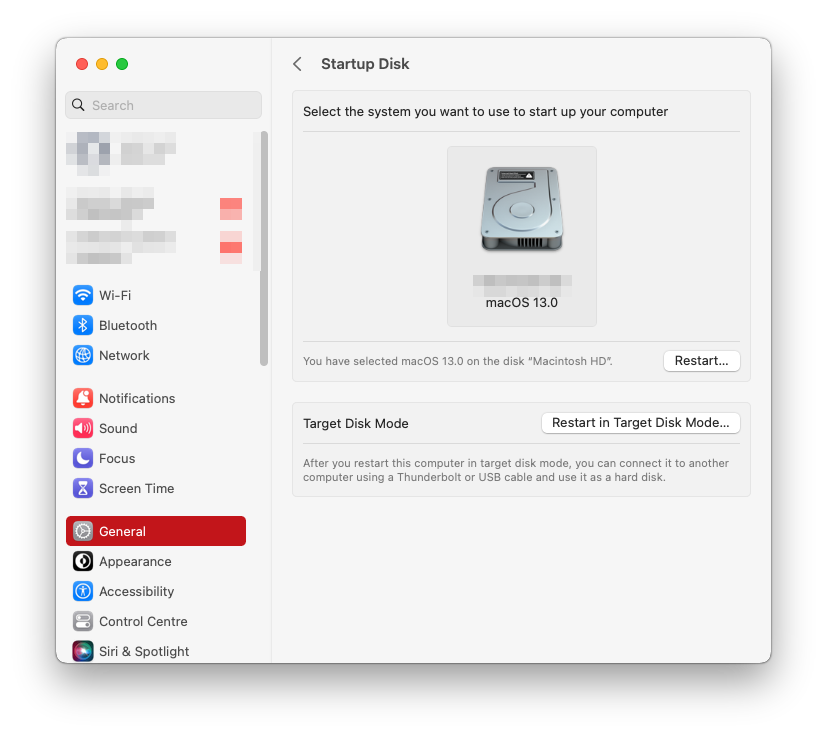
- Click on the Lock icon in the bottom-left corner and enter your administrator password.
- Choose the USB drive from the list of available startup disks.
- Click on the Restart button to apply the changes and restart your Mac.
Initiating the Boot Process from USB
After you have successfully selected the USB drive as the startup disk, your Mac will boot from the USB drive. This process may take a few moments, and you will see the startup progress on your screen. Once the boot process is complete, your Mac will load the operating system from the USB drive.
Remember to safely eject the USB drive when you’re done using it. To do this, go to the Finder, right-click on the USB drive, and choose Eject.
Bootable USB drives offer flexibility and convenience when it comes to managing your Mac’s startup options. Whether you need to install a new operating system or troubleshoot software issues, knowing how to boot your Mac from a USB drive can be a valuable skill.
Troubleshooting Boot Issues
When it comes to booting from a USB drive on your Mac, you may encounter various issues that can disrupt the process. Understanding these common problems and their solutions will help you navigate through the troubleshooting process effectively.
1. Checking USB Drive Compatibility and Integrity
Before attempting to boot your Mac from a USB drive, it is essential to ensure that the drive is compatible and in good condition. Here are some steps you can follow:
- Verify USB Compatibility: Make sure that the USB drive you are using is compatible with your Mac. Refer to the manufacturer’s specifications or consult Apple’s support documentation to confirm compatibility.
- Check USB Integrity: Scan the USB drive for any errors or corruption. On a Mac, you can use the built-in Disk Utility tool to run a First Aid check on the USB drive. If any issues are detected, try repairing them using Disk Utility.
- Create a Bootable USB Drive: Ensure that the USB drive is properly prepared as a bootable device. Follow Apple’s official guidelines or use reliable third-party software to create a bootable USB drive with the required macOS installation files.
For more detailed information on USB compatibility and creating bootable drives, you can refer to the official Apple Support documentation.
2. Resolving Startup Issues using Safe Mode or Recovery Mode
If you are experiencing difficulties booting from a USB drive, you can utilize the Safe Mode or Recovery Mode options on your Mac to troubleshoot startup issues. Here’s how:
Safe Mode: Booting in Safe Mode can help identify and isolate software-related problems that may be hindering the boot process. To enter Safe Mode, follow these steps:
-
- Shut down your Mac completely.
- Press the power button and immediately hold down the Shift key.
- Release the Shift key when you see the login window.
- Once in Safe Mode, you can try booting from the USB drive again to see if the issue persists.
Recovery Mode: If Safe Mode doesn’t resolve the problem, you can use Recovery Mode to perform additional troubleshooting steps. Here’s how to access Recovery Mode:
-
- Shut down your Mac completely.
- Press the power button and immediately hold down the Command (⌘) and R keys simultaneously.
- Release the keys when you see the Apple logo or a spinning globe.
- In Recovery Mode, you can use Disk Utility to repair disk errors, reinstall macOS, or restore from a Time Machine backup.
For more detailed instructions on using Safe Mode or Recovery Mode, you can visit the Apple Support website.
By following these troubleshooting steps, you can overcome common boot issues when attempting to boot from a USB drive on your Mac. Remember to verify compatibility, ensure USB integrity, and utilize Safe Mode or Recovery Mode as necessary to diagnose and resolve any startup problems.
Alternative Methods to Boot Mac from External Drive
When it comes to booting your Mac from an external drive, there are various alternative methods you can explore. These methods provide flexibility and convenience, allowing you to use external storage devices like SSDs or hard drives. Additionally, alternative boot options, such as Thunderbolt or FireWire connections, can enhance the speed and performance of your Mac.
1. Thunderbolt Connection
Mac computers equipped with Thunderbolt ports offer a high-speed connection that allows you to boot from an external drive efficiently. Thunderbolt technology enables data transfer rates of up to 40 Gbps, ensuring fast and responsive boot times. To boot your Mac from a Thunderbolt-connected drive, follow these steps:
- Connect your external drive to your Mac using a Thunderbolt cable.
- Power on your Mac and immediately press and hold the Option (⌥) key on your keyboard.
- You will see the Startup Manager, which displays all available bootable devices.
- Select the external drive you wish to boot from using the arrow keys.
- Press the Return (⏎) key or wait for a few seconds to start your Mac from the selected external drive.
To learn more about Thunderbolt technology and its benefits, you can visit the official Intel Thunderbolt Technology website.
2. FireWire Connection
If you have an older Mac with a FireWire port, you can also utilize this connection to boot from an external drive. While FireWire has been phased out in newer Mac models, it can still be a viable option for older systems. Here’s how you can boot your Mac using a FireWire-connected drive:
- Connect your external drive to your Mac using a FireWire cable.
- Power on your Mac and hold down the Option (⌥) key immediately.
- The Startup Manager will appear, showing all available bootable devices.
- Select the external drive you want to boot from using the arrow keys.
- Press the Return (⏎) key or wait for a few seconds to start your Mac from the selected external drive.
To explore more about FireWire technology and its historical significance, you can visit the FireWire Wikipedia page.
By utilizing Thunderbolt or FireWire connections, you can take advantage of the faster transfer speeds and convenience offered by external drives. Whether you are booting your Mac from a USB drive or an external hard drive, these alternative methods can provide you with flexibility and expand your options for system maintenance, troubleshooting, or data recovery.
Advanced Considerations and Tips
When it comes to booting from USB on your Mac, there are several advanced considerations and tips that can enhance your experience and ensure smooth operation. Here are some key points to keep in mind:
Adjusting Boot Preferences in System Preferences
Before diving into the process of booting from a USB drive, it’s helpful to know how to adjust the boot preferences in System Preferences. Follow these steps:
- Click on the Apple menu in the top-left corner of your screen and select “System Preferences.”
- Choose “Startup Disk” from the available options.
- Select the USB drive you want to use for booting and click on the lock icon in the bottom-left corner to authenticate.
- Click on the “Restart” button to apply the changes and boot from the USB drive.
Adjusting the boot preferences allows you to easily switch between different bootable drives without the need to change settings every time.
Managing Multiple Bootable Drives on Your Mac
If you frequently work with multiple bootable drives on your Mac, it’s essential to effectively manage them. Here are some tips to help you organize and maintain your bootable drives:
- Label your USB drives with meaningful names to easily identify them in the boot preferences and when connected to your Mac.
- Store your bootable USB drives in a secure location to prevent damage and ensure they are readily available when needed.
- Regularly update and maintain your bootable drives by installing the latest macOS updates and necessary software patches.
- Periodically check the integrity and health of your bootable drives using disk utility tools or third-party software.
Removing Bootable Drives
When you’re finished using a bootable USB drive or want to switch back to booting from your internal drive, it’s important to remove the external drive safely. Follow these steps:
- Shut down your Mac or restart it.
- Eject the bootable USB drive properly by clicking on the eject icon next to the drive’s name in the Finder or using the eject button in the Disk Utility app.
- Wait until the USB drive is fully ejected before disconnecting it from your Mac.
Removing the USB drive without properly ejecting it can cause data corruption or other issues.
Resetting NVRAM or PRAM
If you’re experiencing persistent boot issues or incorrect startup disk selection, resetting the NVRAM (non-volatile random-access memory) or PRAM (parameter random-access memory) can sometimes resolve the problem. Here’s how to reset the NVRAM or PRAM on your Mac:
- Shut down your Mac.
- Press the power button, and immediately hold down the Command (⌘), Option, P, and R keys simultaneously.
- Continue holding the keys until you hear the startup chime for the second time or see the Apple logo and progress bar appear and disappear twice.
- Release the keys, and your Mac will continue the startup process.
Resetting the NVRAM or PRAM can reset certain settings, including the default startup disk, display resolution, and sound volume. However, it won’t affect any data or settings stored on your Mac’s internal drive.
By considering these advanced tips and techniques, you can optimize your experience when booting from USB on your Mac. From managing multiple bootable drives to troubleshooting persistent boot issues, these insights can help you make the most of your Mac’s capabilities.
Conclusion
Booting a Mac from a USB drive grants users the flexibility to carry their operating system wherever they go and access their files on different machines. This article has presented a comprehensive guide on how to boot a Mac from a USB drive, covering preparations, creating a bootable USB drive, and the booting process itself. It also explores alternative methods using Thunderbolt and FireWire connections. By following the instructions and tips outlined in this article, Mac users can optimize their booting experience, troubleshoot common issues, and expand their possibilities with different operating systems. Booting from a USB drive empowers users to take control of their Mac and explore new horizons.
FAQ
There could be several reasons why you’re unable to boot from a USB on your Mac. Here are a few common issues and their solutions:
- Incompatible USB drive format: Macs typically require USB drives to be formatted in the GUID Partition Map (GPT) scheme. Ensure that your USB drive is formatted using this scheme.
- Improper bootable disk creation: Make sure that you have properly created a bootable USB drive using a compatible macOS installer or a disk cloning tool.
- Startup disk selection: Check your Mac’s Startup Disk preferences in System Preferences to ensure that the USB drive is selected as the startup disk.
To boot your Mac from a USB using a Windows keyboard, follow these steps:
- Connect the USB drive to your Mac.
- Restart your Mac and immediately press and hold the Alt key on your Windows keyboard.
- Keep holding the Option key until you see the Startup Manager screen.
- Use the arrow keys on your Windows keyboard to select the USB drive as the startup disk.
- Press Enter to start booting from the USB drive.
Booting from a USB on a Mac with the M1 chip requires a slightly different process compared to Intel-based Macs. Here’s what you need to do:
- Connect the USB drive to your M1 Mac.
- Click on the Apple menu and select “Restart” or “Shut Down.”
- While restarting, immediately press and hold the power button until you see the Startup Options window.
- From the Startup Options, select the USB drive you want to boot from.
- Click on “Continue” to start booting from the USB drive.
To create a macOS bootable USB on a Windows 10 computer, you can use a third-party tool like “TransMac” or follow these steps:
- Download the macOS installer from the Apple website or App Store on your Windows 10 computer.
- Connect a USB drive with sufficient storage capacity to your Windows 10 computer.
- Download and install a tool like “BalenaEtcher” or “Rufus” to create the bootable USB drive.
- Open the tool and select the downloaded macOS installer file and the connected USB drive.
- Follow the instructions provided by the tool to create the bootable USB drive.
Note: Make sure to back up any important data on your Mac or the USB drive before formatting or performing any changes to avoid data loss.