Modern iPhones, thanks to technological advancements, have carved a niche for themselves in the realm of photography and photo management. Not only do they boast impressive camera specifications, but they also offer intricate systems for storing and managing photographs. However, even with these state-of-the-art features, users often find themselves at a crossroads, pondering whether to delete imported photos. This article sheds light on various reasons that might drive users to make such decisions and offers insights into the broader implications of these choices.
Reasons to Delete Imported Photos on iPhone
Modern iPhones are technological marvels, and their photo and video management systems are no exception. However, as intricate as the mechanisms of photo storage on the iPhone might be, sometimes users find it essential to delete imported photos on iPhone. Here’s why:
| Reason | Description |
| ? Storage Constraints | Despite iPhones having generous storage, space isn’t infinite. High-resolution or Live Photos can occupy a lot. It’s beneficial to delete photos from iPhone after import to make room for fresh memories and ensure a smoother experience. |
| ?️ Improved Organization | Imported photos can sometimes have inconsistent metadata, leading to disruptions in the iPhone’s natural photo categorization. To maintain an orderly gallery, users might choose to import and delete photos from iPhone after ensuring that the metadata aligns with the device’s native photos. |
| ? Clarity Between Originals and Imported | Importing, exporting, and then re-importing photos can cause users to have several versions of the same picture. By deciding to delete already imported photos from iPhone, users ensure clarity and distinction between original snaps and those sourced from other platforms or devices. |
Ultimately, it’s about maintaining a seamless experience. While iPhones offer numerous ways to manage and organize photos, it’s also up to users to ensure their galleries remain clutter-free. Regularly revisiting and deciding to delete already imported photos from iPhone can contribute to a cleaner, more organized photo library, ensuring deleted photos are permanently removed.
Guide to Deleting Imported Photos on iPhone
Ensuring a streamlined photo library on your iPhone isn’t just about knowing why you should delete imported images; it’s also about understanding how to do it. Given the diverse ways photos can find their way onto your device, a step-by-step guide can be indispensable. From distinguishing imported photos to managing iCloud sync, each step provides clarity in the process. Dive into this guide to simplify your photo management.
Step 1: Identifying Imported Photos
One challenge iPhone users often face is distinguishing between imported photos and original captures. To manually identify imported images:
- Open the Photos app and navigate to the ‘Albums’ tab.
- Scroll down to the ‘Other Albums’ section. Imported images usually reside in an album labeled ‘From My Mac’ or similarly.
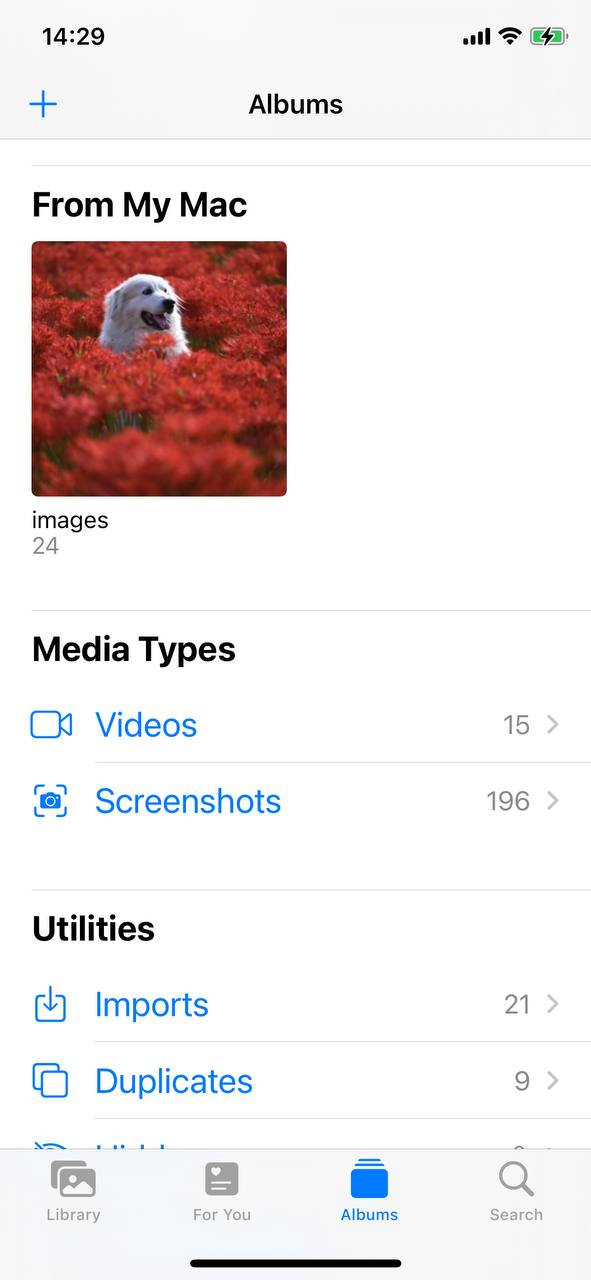
- Review the images in this album. They’re typically the ones imported from other devices or platforms.
Step 2: Deleting Individual or Multiple Photos
Whether you want to delete imported photos from iPhone or originals, the process is straightforward:
- Open the Photos app.
- Tap on ‘Photos’ or ‘Albums’ at the bottom.

- Find the photo(s) you wish to delete.
- Press and hold a photo until options appear. Tap ‘Select’.
- Choose the individual or multiple photos you want to delete.
 Tap the trash button (icon) at the bottom right. Confirm the deletion.
Step 3: Removing Photos Synced from Mac
If you’ve synced photos from your computer, especially a Mac, deleting them can be slightly different. Here’s how to remove imported photos from iPhone when synced:
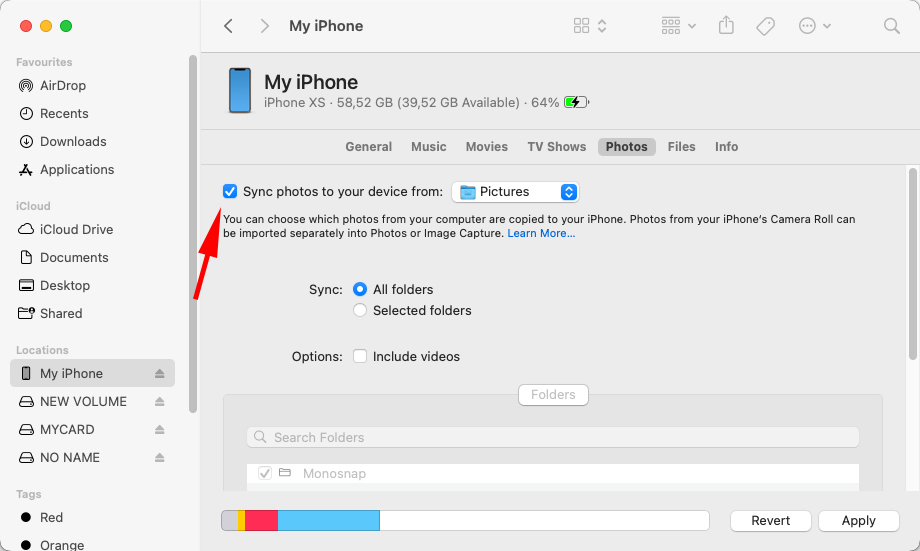
- Connect your iPhone to your Mac.
- Open iTunes (for macOS Mojave and earlier) or Finder (for macOS Catalina and later).
- Select your iPhone from the sidebar.
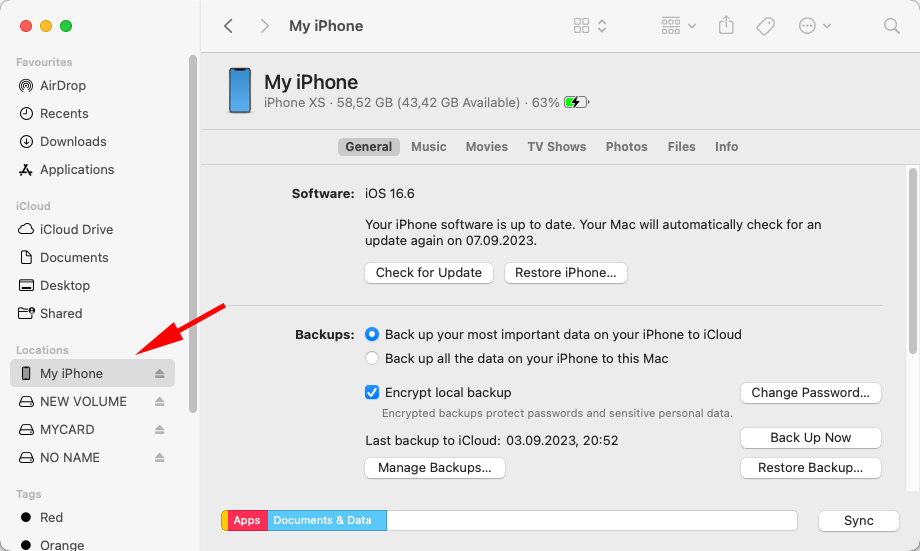
- Under ‘Settings’, choose ‘Photos’.
- Uncheck ‘Sync Photos’ option and apply changes. This action will remove all synced photos from your iPhone.
Step 4: Addressing iCloud Syncing
iCloud Photos seamlessly syncs pictures across all Apple devices. If you delete photos after import iPhone, it will also delete them from other devices where iCloud Photos is enabled. Ensure you have backups of any essential images before deleting. To learn more about this sync mechanism, visit Apple’s official iCloud Photos guide.
Step 5: Import to Mac with Deletion Option
For users seeking to import and delete photos from iPhone to Mac, the Photos app on Mac makes it a breeze:
- Connect your iPhone to the Mac using a suitable cable.
- Open the Photos app on Mac.
- Select the iPhone under ‘Devices’ in the sidebar.
- Choose the photos to import.
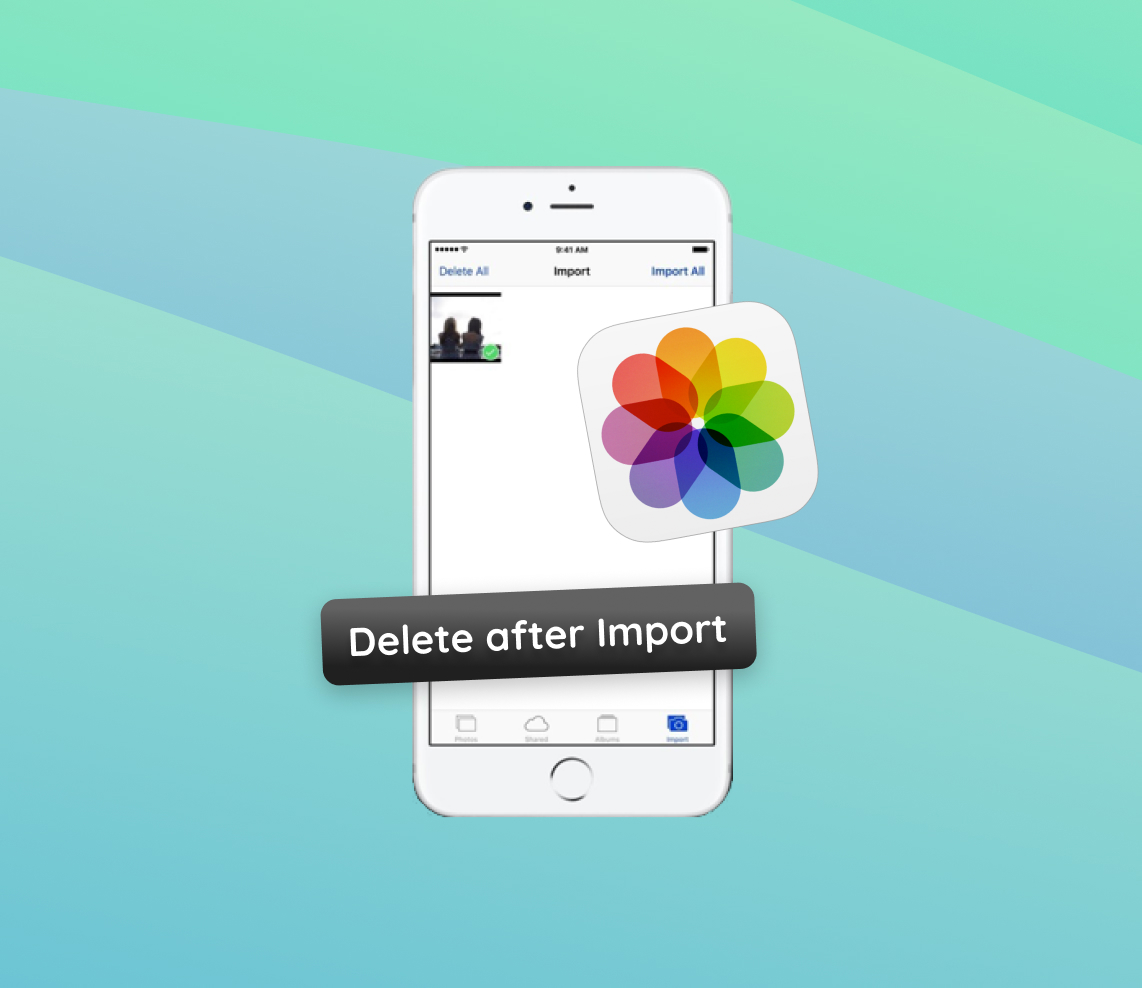
- You’ll see an option to “Delete items”. Choose this to remove the imported photos from your iPhone.
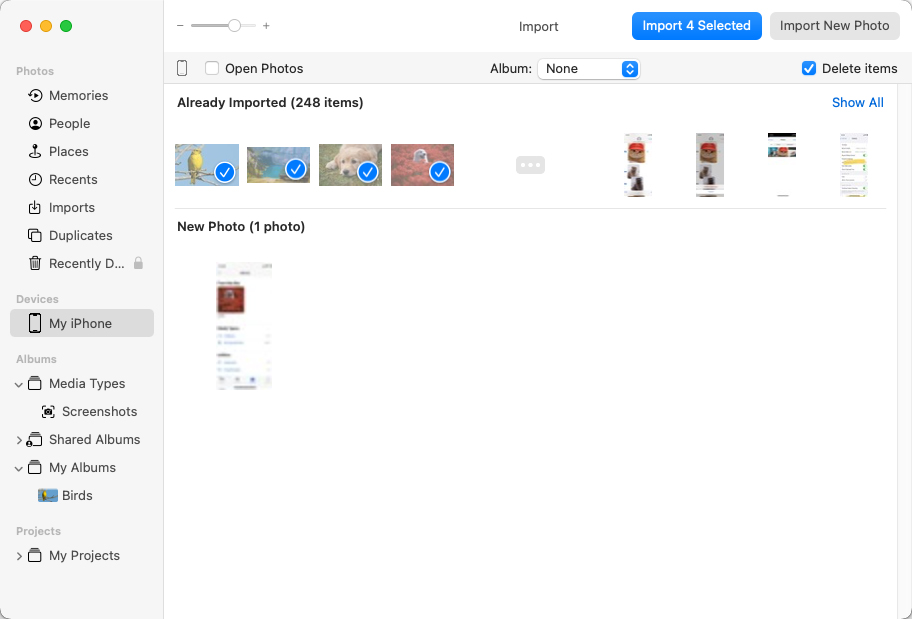
- Click ‘Import Selected’ or ‘Import All’.
“Delete after Import” cannot be available on an iPhone or iPad, if the device is syncing with iCloud Photos
Regularly managing and deleting unnecessary imported photos ensures a clean and organized photo library. With these steps, users can efficiently manage their photo storage and maintain a clutter-free gallery on their iPhones.
Organizing and Managing Imported Photos Efficiently
Efficient photo management is paramount in preserving memories and ensuring a seamless iPhone experience. Instead of navigating through a cluttered library, use these structured strategies to optimize your photo organization. Below is a quick-reference guide to aid you:
| Strategy | Description | Implementation |
| ? Creating Dedicated Albums | Segregate imported photos from original captures. | • Create an album for imported photos (based on source, date, or event). • Move the imported photos to this album post import and delete photos from iPhone to Mac. |
| ?️ Leveraging Tags and Keywords | Efficiently categorize and swiftly search with tags. | • Open a photo, swipe up, and tap ‘Add a Caption’. • This aids when you opt to delete imported photos from iPhone. |
| ?️ Scheduling Regular Clean-ups | Ensure a tidy library and effectively manage storage. | • Review imported albums periodically for duplicates. • Update album names, tags, and captions. |
| ? Mastering Search and Smart Albums | Use advanced search and automate photo organization. | • Utilize the search feature in the Photos app. • Create Smart Albums based on criteria. Refer to a guide on Macworld for insights. |
By adopting these strategies, enhanced with visual cues, you not only enhance your photo browsing experience but also ensure that each memory is easily accessible and enjoyable.
Conclusion
The allure of iPhones lies not just in their sleek designs but also in their ability to provide a seamless experience, especially in photo management. Nevertheless, as users continue to capture memories and import photographs, challenges like storage constraints and organization arise. It’s imperative to recognize that managing and occasionally deleting imported photos can be instrumental in maintaining an iPhone’s performance and ensuring a clutter-free gallery. By delving into the reasons for these actions, users are better equipped to optimize their device’s capabilities and enjoy a more streamlined experience.
FAQ
When you import photos into your device, they may often be stored in a separate album or folder named “Imports” or something similar. Additionally, you can check the metadata of the photos. Original photos taken with the device will have the device’s name as the camera model in their EXIF data, whereas imported photos might have a different camera model or no such data.
There are several reasons you might not be able to delete certain photos from your iPhone:
- The photos are synced from a computer. If you’ve synced photos from a computer to your iPhone using iTunes, you can’t delete those photos directly from your iPhone. You’d need to unsync them from iTunes.
- Restrictions or parental controls are enabled.
- The photos might be part of a shared album, and you don’t have the necessary permissions to delete them.
If you’re using iCloud Photos, when you delete a photo from one device, it will also be deleted from all other devices where you’re signed in with the same Apple ID. This is because iCloud Photos keeps your photos and videos updated across all your devices. However, you will have a 30-day window to recover the deleted photos from the “Recently Deleted” album.
Yes, if you accidentally delete imported photos from your iPhone, you can restore them from the “Recently Deleted” album within 30 days of deletion. After 30 days, the photos will be permanently removed from the device. If you have a backup of your iPhone, either on iCloud or iTunes, you can also restore your device to retrieve the deleted photos.