
As a long-time Mac and Chrome user, I’ve learned the importance of regular browser maintenance for an optimal online experience. In this guide, I’ll share insights on why it’s crucial to clear your cache on Chrome for Mac, provide a simple step-by-step process to do so, and offer troubleshooting tips for when clearing cache doesn’t solve browser issues.
Why Clear Cache on Chrome for Mac?
In my experience, clearing the cache on Chrome for Mac offers significant benefits that enhance the browsing experience. It’s not just about freeing up storage space; it’s also about optimizing the browser’s performance in several key areas.
- Improved Loading Times: I’ve noticed that over time, Chrome accumulates a substantial amount of cached data, which can slow down the browser. Clearing this cache helps in speeding up page load times, ensuring a smoother browsing experience.
- Resolved Site-Related Issues: Occasionally, cached data can cause issues with website loading or functionality. Clearing the cache typically resolves these issues, as it forces Chrome to retrieve the latest version of web pages.
Moreover, the practice of regularly clearing cache and cookies on Mac Chrome comes with notable privacy and data security benefits:
- Enhanced Privacy: Cached data can contain personal information and browsing history. Clearing it reduces the risk of data being accessed by unauthorized parties.
- Data Security: Regular cache clearing minimizes the chances of data corruption and potential security vulnerabilities.
Maintaining optimal browser functionality is crucial for a seamless internet experience. Regularly clearing the browser cache on Mac Chrome ensures that your browser runs efficiently and securely. This simple yet effective action can significantly impact your overall browsing quality.
For more detailed insights into how browser cache works and its impact on your browsing experience, you can visit WeTheGeek. Additionally, to understand the privacy aspects of clearing cache, the article on Kaspersky offers a comprehensive overview.
How to Clear Cache on Mac Chrome: Step-by-Step Guide
Clearing your cache in Chrome on a Mac is a straightforward process. This step-by-step guide will walk you through how to clear your cache on Chrome Mac, ensuring your browser runs more efficiently.
- Open Chrome: Start by launching the Chrome browser on your Mac.
- Access Chrome Settings: Click on the three dots in the upper-right corner of the browser window to open the menu. Then select ‘Settings’.

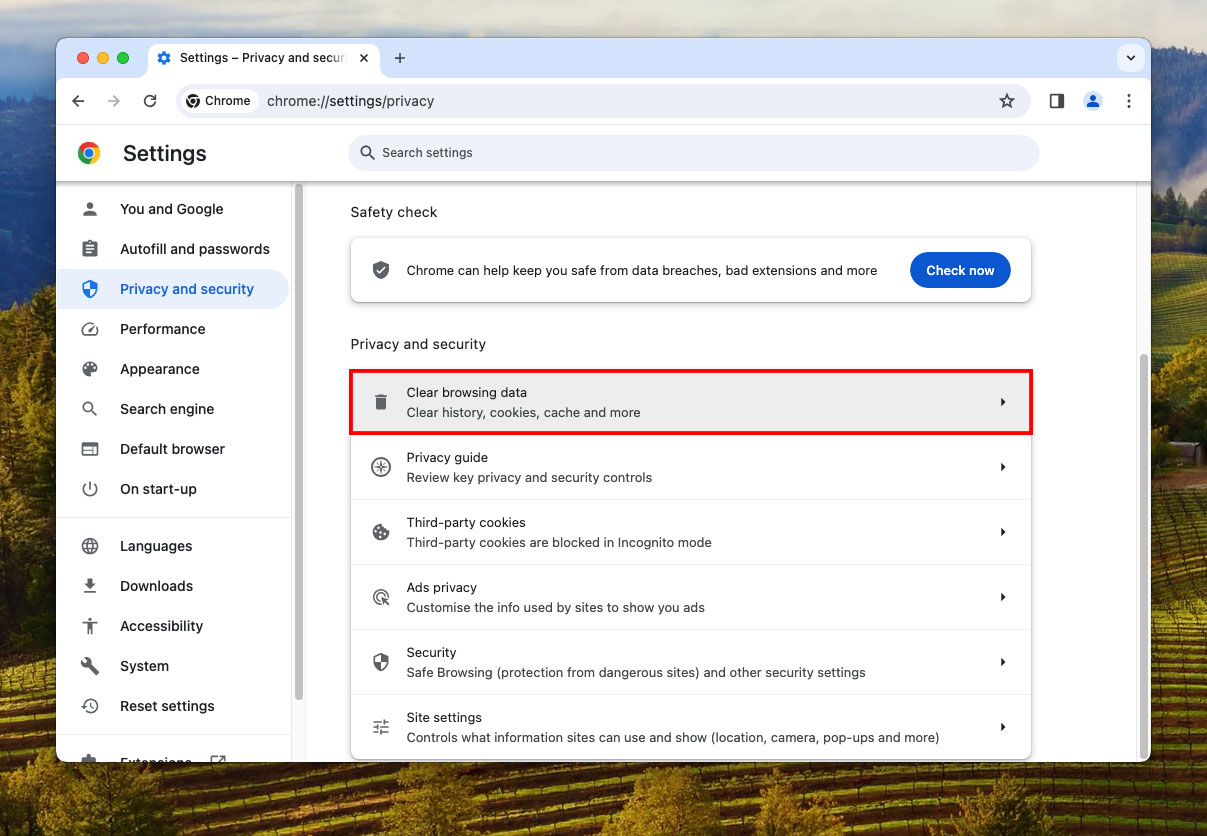
- Navigate to Privacy and Security: In the Settings menu, find and click on ‘Privacy and security’ on the left-hand side.
- Clear Browsing Data: Within the Privacy and security section, click on ‘Clear browsing data’. A new window will pop up.
- Select the Time Range: In the new window, choose the time range for which you want to clear the cache. You can select ‘All time’ to clear everything.
- Choose What to Clear: Ensure the ‘Cached images and files’ option is checked. You can also select ‘Cookies and other site data’ if you wish to clear cookies and cache on Mac Chrome simultaneously.
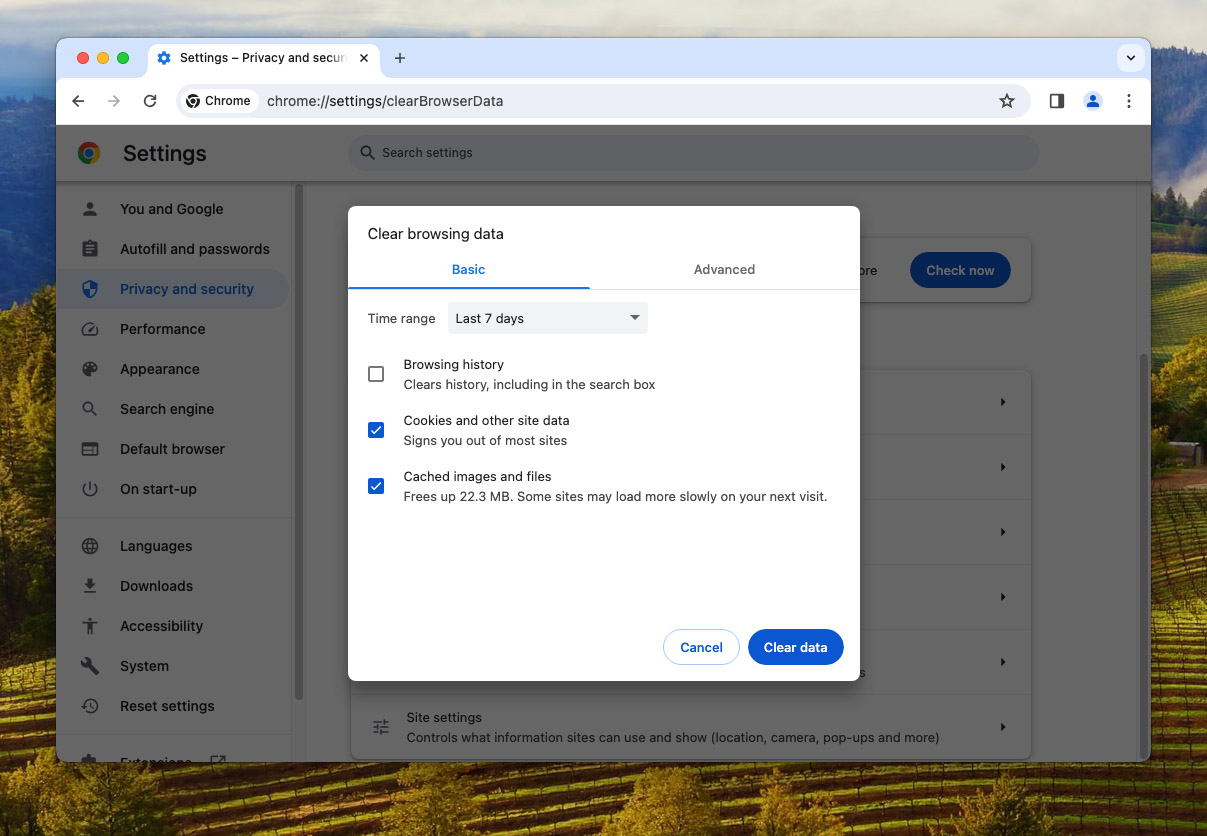
- Clear Data: Click on the ‘Clear data’ button to clear your selected cache and cookies.
Once you’ve completed these steps, your cache in Chrome will be successfully cleared. This action will help your browser perform better and load pages more quickly. For additional information on managing your browser’s data, you can refer to Chrome’s official support page at Google Support.
Remember, it’s a good practice to regularly clear browser cache on Mac Chrome to maintain optimal performance and enhance your browsing security
Troubleshooting: When Clearing Cache Doesn’t Solve the Problem
Sometimes, even after clearing cache in Chrome on Mac, you might still encounter browser issues. If clearing your cache doesn’t resolve these problems, there are a few other strategies you can try to get Chrome back to its optimal performance.
- Check Browser Extensions: Certain extensions can cause issues with Chrome. Disabling extensions one by one can help identify if any are causing problems.
- Update Google Chrome: Running an outdated version of Chrome can lead to performance issues. Ensure your browser is up to date by checking for any available updates in Chrome settings.
- Reinstall Chrome: If the above steps don’t work, consider uninstalling and then reinstalling Chrome. This can resolve deeper issues that clearing the cache cannot fix.
In addition to these steps, it’s also worth considering the following:
- Clear Cookies: While you might have already cleared cache and cookies on Mac Chrome, sometimes redoing this step can be beneficial, especially if the initial clearing was incomplete.
- Check Internet Connection: Sometimes the issue might be with your internet connection rather than the browser itself.
- Scan for Malware: Malware can often cause unexpected browser behavior. Use a reliable antivirus program to scan your Mac.
If you continue to experience issues after trying these solutions, you may want to consult further resources. For detailed troubleshooting guides, visit Chrome’s official Help Page. Additionally, Apple’s Support Page for Mac can provide more insights into addressing Mac-specific issues.
Conclusion
Throughout my journey with Chrome on Mac, I’ve discovered that regular maintenance, like clearing the cache, plays a pivotal role in ensuring a smooth browsing experience. Not only does it help in resolving loading and functionality issues, but it also safeguards personal data. While the steps I’ve outlined are typically effective, there are times when they might not resolve all issues. In such cases, exploring additional solutions like checking extensions, updating Chrome, or even a reinstallation can be necessary. Remember, a well-maintained browser is key to a hassle-free online experience. So, take the time to regularly clear your cache and keep Chrome updated—it’s a small effort that can lead to significant improvements in your daily browsing.
FAQ
Mac systems do not automatically clear the Chrome browser cache. Users need to manually clear the cache in Chrome to ensure that the browser is using the most current version of web pages and to free up storage space. This process can be completed following the steps outlined in our step-by-step guide above.
Yes, it is safe to delete all cache files on your Mac. Clearing cache does not affect the core functions of your apps or the Chrome browser. It can free up storage space and resolve performance and security issues. However, after clearing the cache, websites may load a bit slower during your next visit as the browser needs to download fresh data.
To find your browser cache in Chrome on Mac, open Chrome, go to Settings by clicking the three dots in the upper-right corner, and select ‘Privacy and security.’ From there, click on ‘Clear browsing data.’ In this window, you can view the amount of cached images and files. Remember, clearing this cache can be done following the instructions in our guide above.